Showing posts with label baking. Show all posts

Tuesday, March 18, 2014

A Peanut Butter Dog Cookie

Atticus always joins me in the kitchen while I bake, so I thought that I'd bake something especially for him this time. I read through a few dog biscuit recipes to get a rough idea of proportions. I decided to keep it basic for the first batch and go with peanut butter as the main flavor because I know Atticus loves it.


This recipe made a lot of biscuits, but with my chowhound I'm sure they won't last very long.


Atticus's Peanut Butter Cookies
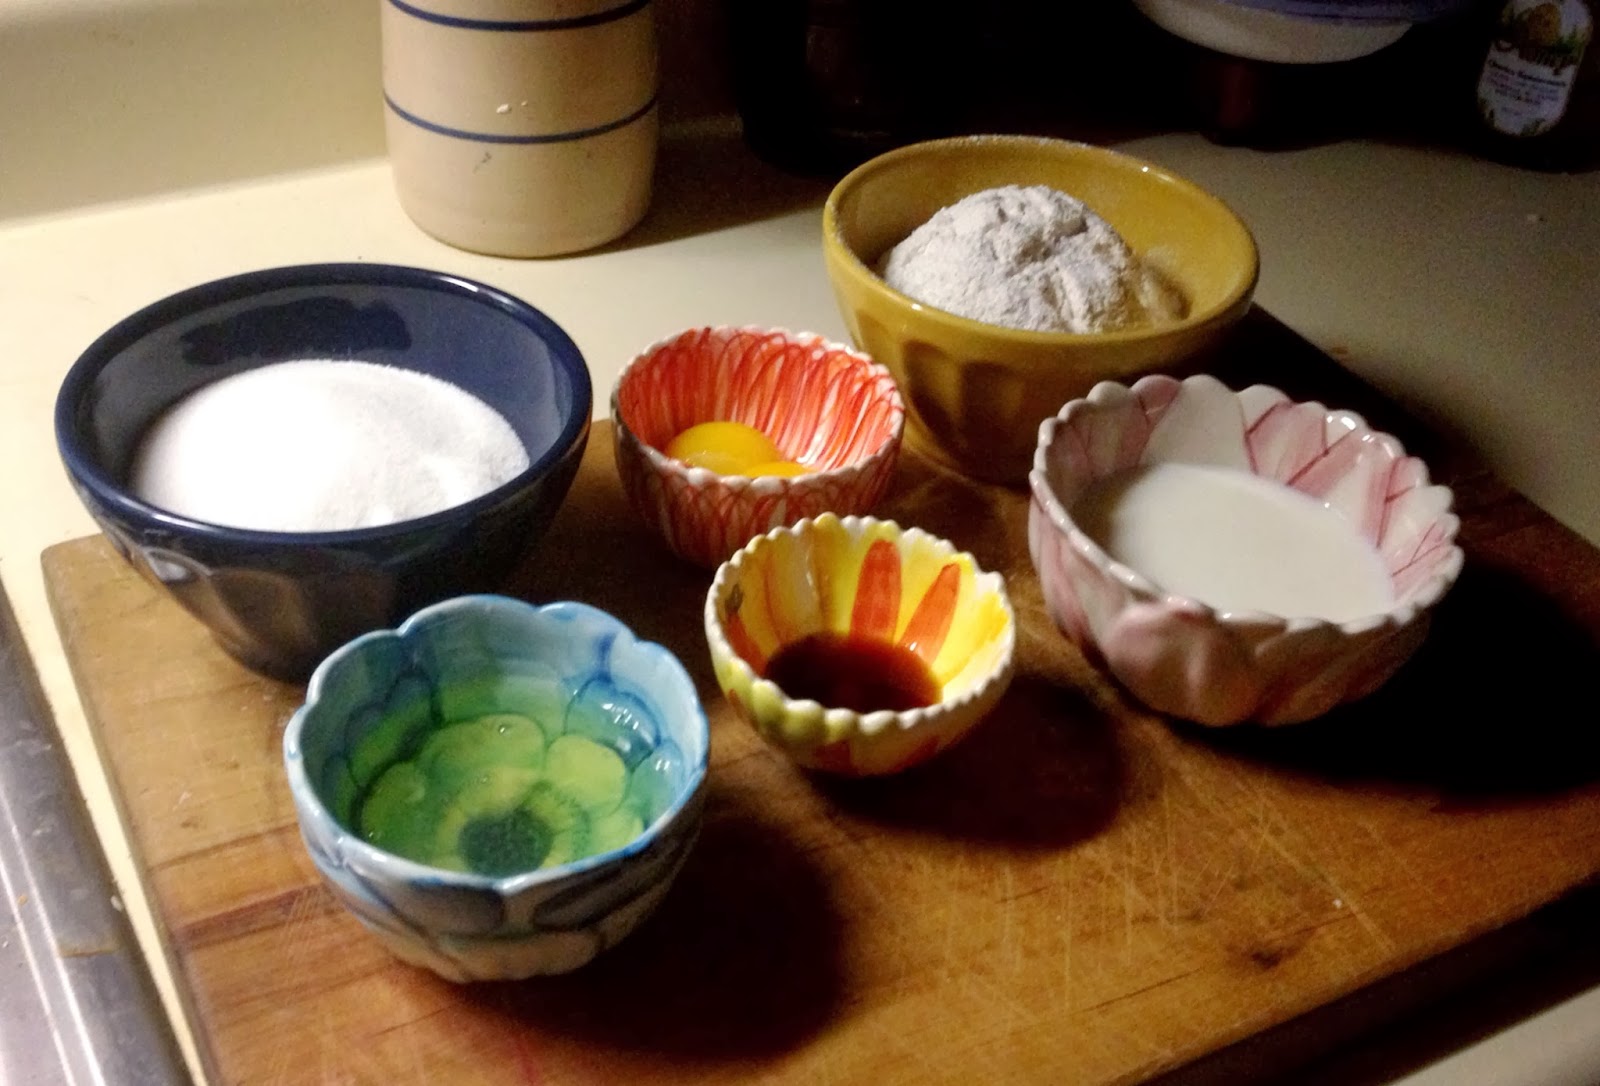
3 cups whole wheat flour
1 1/2 cups rolled oats
1 cup organic cornmeal
1/2 tsp baking powder
2 eggs
1 cup peanut butter
1 Tsp vegetable oil
1/2 cup water
1 cup and 2 Tsp milk


Preheat oven to 350 degrees.

Combine flour, oats, corn meal, and baking powder in the bowl of a stand mixer. Mix until evenly combined.

Add the eggs, peanut butter, and oil and beat until incorporated.

Add 1 cup of milk and 1/2 cup of water. Beat until the dough comes together. Add the tablespoons of milk one at a time as needed to bring the dough together.


Separate into manageable-sized disks according to the size of your rolling surface. Roll out one disk at a time into an even thickness. Mine came out to be a little more than 1/4 inch thick, but you can add thickness and baking time if you want a biscuit that more closely resembles the thickness of store bought ones.


Cut out cookies into desired shape and place on a lined or greased cookie sheet.


Bake for 16-18 minutes or until firm.


Since making these, I've read some articles about the use of cornmeal in dog food, and it seems to be a highly disputed subject. I used cornmeal because I thought it would add texture and weight to the cookies, and I saw it in other recipes. I will play around with the next batch I make and possibly make some changes like adding apples/apple sauce, omitting the cornmeal, and adjusting the proportions of the other ingredients accordingly.

Atticus highly approves of these cookies!


Let me know what your hounds think.


Happy baking, y'all!

Saturday, March 15, 2014

A whole wheat, oat, and strawberry muffin

This recipe came out of a late night baking experiement. It has been quite a while since I have tried my hand at developing a new recipe, but I was wide awake, Atticus was being wild, and I had two cartons of strawberries on the verge of going bad in my fridge.

I used my other whole grain muffin recipes as a starting place and worked from there.


Whole Wheat, Oat, and Strawberry Muffins
Yield: 24 muffins

Ingredients:
1 cup whole wheat flour
1 cup AP flour
1 1/2 cups rolled oats
2 tsps baking powder
1 tsps baking soda
1 Tsp cinnamon (I might cut this down to a tsp next time)
1/2 tsp salt
1 cup sugar
1/4 cup brown sugar
3 eggs (lightly beaten)
5 Tsps butter (melted and cooled)
2/3 cup vegetable oil
1 cup milk
1 Tsp vanilla
2 cups fresh strawberries (sliced)


Preheat the oven to 350 degrees. Line muffin tins with cupcake papers or spray with non-stick baking spray.

Combine the dry ingredients in the mixing bowl until consistently incorporated.

Add the slightly beaten eggs, cooled butter, oil, milk, and vanilla to the to the dry ingredients and mix.

Fold in the strawberries.

Fill the muffin tins and bake for 18 minutes or until the center of the muffin bounces back when lightly pressed.


I took these to the office, and everyone seemed to enjoy them. This was my first time to bake with strawberries. I was pleased with the result. If you try them, please pop back over and leave feedback.

Happy baking, y'all!

Monday, March 10, 2014

A Sponge Cake with Fresh Strawberries and Whipped Cream

It's strawberry season again, y'all! Even though the weather here has been much cooler than normal, strawberries remind me that springtime is indeed here to stay.

When I told Mom that I wanted to make a cake for a friend's belated birthday, she suggested that I try this sponge cake recipe with fresh strawberries and whipped cream. It's not your typical icing laden and often chocolate birthday cake, but it made sense in this scenario because I wasn't giving it to Charlie on his birthday and Sandy doesn't eat chocolate. Think of this cake as the birthday version of angel food cake, strawberries, and cool whip--richer and more decadent but still fresh and light.


This hot milk sponge cake recipe comes from my great, great aunt Ollie by way of my great grandmother Anne. My grandmother Eleanor then gave the recipe to my mom in the 1970s, telling her that the recipe was over 100 years old at that time. I cherish recipes with histories because I enjoy feeling connected to the women in my family who have come before me.

Ingredients:
1 cup AP flour
1 cup sugar
2 tsp baking powder
2 eggs
1/2 cup hot milk
1 tsp vanilla
1 carton strawberries
2 tsp sugar
1 cup whipping cream
2 Tsp powder sugar
1 tsp vanilla

The well used copy of the recipe that my grandmother wrote for my mother, the title reads: "Cake Aunt Ollie (Mother's cake)." 

Preheat the oven to 350 degrees. Measure out all of the ingredients through the vanilla, making sure to cleanly separate the eggs. Sift the flour and baking powder together.


Beat egg yolks until they form stiff peaks. In another bowl, beat the egg yolks and the sugar together until they reach a pale yellow color. Alternately add the flour mixture and milk to the egg and sugar mixture. Add vanilla. Fold in the egg whites. Line a 8x8 or 9x9 baking pan with tin foil. Do not grease the pan or the foil. Bake for 25 minutes.

For the topping:
Cut up the strawberries into your desired size. Mix 2 teaspoons of sugar in with the strawberries. Begin the whipping cream on a low speed in the mixer increasing the speed as it thickens. Add 2 tablespoons of sifted powdered sugar and a teaspoon of vanilla to the whipped cream.


Let the cake cool and turn it out onto the serving plate. It is not the prettiest cake uncovered as you can see above, so cover the top with whipping cream. Then, cut the cake and serve it with strawberries.

This was the first time that I have made this cake on my own, and although I did not taste it, I received rave reviews about it from those who had a piece or four.

Happy baking, y'all!

Wednesday, February 20, 2013

A Salted Caramel Icing


Caramel intimidates me, plain and simple. It always has. I have many childhood memories of watching my parents work together to make Mom's much loved caramel icing that tops a hot milk sheet cake. The whole process is nerve wracking to even watch let alone participate in because so many things can go wrong--the sugar can burn or the caramel can get grainy if not poured and spread quickly enough. The icing alone takes a few hours, lots of patience, teamwork, and perfect timing, and these are the reasons that I have never attempted mom's caramel cake on my own.

So when Mom suggested that I make a caramel icing to top chocolate cupcakes for our English Graduate Organization bake sale, I thought to myself, "Well, that's not going to happen." But Mom reassured me that she had a different caramel icing recipe from her Aunt Harriet that would not be as painful or time consuming as her traditional caramel. This recipe is traditionally used to top a prune cake, but it was indeed very simple and worked perfectly for these cupcakes.

To begin, I baked the cupcakes, using my chocolate cupcake recipe and let them cool completely. Then, it was on to the icing.


Salted Caramel Icing
1 stick butter
1 cup firmly packed brown sugar
1/4 cup milk
1/4 teaspoon sea salt or Kosher salt
2 tablespoons heavy whipping cream
2 cups powdered sugar
1-2 tablespoons sea salt
1-2 tablespoons raw sugar

In a medium-sized sauce pan, combine the butter, brown sugar, and milk.

Bring these ingredients to a boil, stirring frequently with a whisk. Let the mixture boil for 3 minutes, continuing to stir.

After 3 minutes, add 1/4 teaspoon of the sea or Kosher salt. I used Kosher because it dissolves very quickly. You can also adjust the amount of salt to your liking. I love salted caramel, but I have found that I enjoy more of a subtle salt taste rather than an intense one.

After whisking in the salt, add the whipping cream and continue to whisk. I added the cream to the original recipe to thicken and smooth the icing.

When the cream is incorporated, remove the pan from the heat, and use a handheld mixer to whisk in the powdered sugar a cup at a time. Continue mixing the icing until it is completely smooth and cool enough to spread.

There is a small window of time to ice the cupcakes and sprinkle on the salt/sugar garnish, so I suggest mixing equal parts sea salt and raw sugar in a small bowl before beginning to ice the cupcakes. Like the salt in the caramel, you can alter the ratio of salt to sugar or cut out the sugar entirely according to your salt preference. I used the raw sugar not only to cut the salt but also because I like the way larger, darker grain of the raw sugar looks and tastes.

After spreading the icing on an individual cupcake, immediately sprinkle on the salt/sugar mixture to insure that the sprinkles stick to the icing before it hardens.

Try to ice the cupcakes as quickly as possible to avoid the caramel becoming grainy, but if it does, whisking it quickly over low heat with the handheld mixer will give you a little more time to complete the icing process.


Whether these are for a school bake sale or a fancy party, I promise that these cupcakes won't disappoint any of your friends or their taste buds.

Happy baking!

Monday, January 28, 2013

A Whole Wheat Morning Glory Muffin

I am on a mission to develop healthy-ish, but still tasty, breakfast muffin recipes. These pumpkin muffins were a start, but I still feel a little guilty eating something with chocolate chips more than once or twice a week. When Mom mentioned that she had baked Morning Glory muffins a few weeks ago and that they froze well, I started looking for recipes. Let me tell you that there a quite a few different types of muffins that fall under the Morning Glory title. After a few hours of reading recipes, I decided to just work with the basic muffin recipe from my pumpkin muffins and use ingredients that I already had at home.

Morning Glory muffins

I am thrilled with the way these turned out. The whole grains, carrots, and apples don't over power the muffin like I was afraid they would, but they do make for a hearty taste. Steve, who usually turns up his nose at anything that appears to be healthy, was skeptical of the grated carrots, but he ended up eating a few after dinner last night and gave them a thumbs up.


Whole Wheat Morning Glory Muffins

1 1/2 cups whole wheat flour
1/2 cup AP flour
1/4 cup wheat bran
1/4 cup ground flaxseed
3/4 cup granulated sugar
1/4 cup brown sugar
2 teaspoons baking soda
1 teaspoon baking powder
1 1/2 teaspoons cinnamon
1/4 teaspoon cloves
1/8 teaspoon nutmeg
1/4 teaspoon ginger
3/4 teaspoon salt
1 1/2 cups peeled and grated carrots
1 large peeled and grated apple
1/2 cup chopped walnuts
1/4 cup dried cranberries
1/4 cup raisins
4 large eggs
2 ripe bananas
3/4 cup vegetable oil
2 tablespoons molasses
2 teaspoons vanilla

Whisk all dry ingredients together in a large bowl.

Grate carrots and apple. Combine with raisins, cranberries, and walnuts. Add to the dry ingredients and  stir until incorporated.

In a medium sized bowl, mash bananas and whisk together with eggs, oil, molasses, and vanilla. Add to the mixture in the large bowl and stir until evenly incorporated.

Coat 18-24 muffin tins or use cupcake papers. Fill tins and bake in at 375 degrees for 20-25 minutes.


Sunday, January 13, 2013

A Second Goal Accomplished: A Picnic with Steve

I'm quite a bit late posting about this goal from 4 Simple Goals Before 2013. But I forbid myself from blogging during the busy end of the semester, and the break just got away from me.

Long live the Hercules (Steve's bike).
It was stolen a week or two after the picnic.

On a lovely Sunday afternoon in November, Steve and I went on a picnic to celebrate a little milestone and enjoy the warm weather. We picked Manderson Landing, a park that overlooks the Black Warrior River, as our destination, packed up the bikes with a mom-made quilt and a little lunch, and headed out. It was a lovely day complete with fall leaves and adorable dogs.


I baked french bread the day before and made a big picnic sandwich for us to split. Steve brought the chips and cokes.


Steve wasn't too impressed with the Renaissance Fair-esque sword fighting going on across the sidewalk, but it's all a day at the park.


I also baked some pantry cookies. I'll post this recipe and the one for the picnic sandwich soon.


My mother made this quilt for my dorm room bed my freshman year of college. I simply love it, and it's perfect for a picnic.


I'm afraid I will only be 2 for 4 on my 4 Simple Goals before 2013. I'll put the letter writing and dressmaking on my list for the new year.


I enjoyed a Christmas break filled to the brim with sewing, cooking, traveling, and visiting with family. Now, I'm a few days into the new semester.

I hope that y'all enjoyed the holidays and your new year is off to a nice start.

Thursday, December 20, 2012

A Chocolate Cupcake with Peppermint Buttercream

These cupcakes are my new favorite holiday treat, and they're perfect for sharing.


Last Tuesday night in the midst of paper writing season, I came to a point where I couldn't read or write another word about Thoreau or feminist theory. I needed a productive excuse to escape to my kitchen for a few hours. I knew I couldn't call my mother for suggestions because she would have told me that what I really should have been doing was writing not baking, which was the truth, but I've always been a little stubborn. Without my normal mom-sultation, I considered a couple of different holiday treats and possible flavor combinations, and I decided to try my hand at creating cupcakes that combine two of my favorite sweets. I adapted this cupcake recipe from a chocolate cake recipe, changing the butter to oil and tweaking a few small things, and I simply substituted peppermint extract for vanilla in our regular buttercream recipe and added crushed candy canes to the top for taste and decoration.


Chocolate Cupcakes (yield: 24)
3/4 cup unsweetened cocoa
1 1/2 cups flour
1 1/2 cups sugar
1 1/2 teaspoons baking soda
3/4 teaspoon baking powder
1/2 teaspoon salt
2  eggs
3/4 cup water
3/4 cup buttermilk
1/3 cup vegetable oil
1 teaspoon vanilla extract

Preheat oven to 350 degrees. Fill 24 muffin tins with cupcake papers.

Whisk dry ingredients together in a large bowl.

Add wet ingredients to the dry and mix thoroughly.

Fill cupcake papers in tins 2/3 full. Bake for 15 minutes or until a toothpick/fork comes out clean from the center of a cupcake.

Remove cupcakes from tins and let them cool completely before frosting.


Peppermint Buttercream Frosting
1/2 cup (1 stick) butter, softened
4 cups powdered sugar
2 tablespoons half and half (could substitute milk)
3/4 teaspoon peppermint extract
crushed candy canes for topping (optional)

I love frosting, but I think a little goes a long way with the sweetness of buttercream. Therefore, this buttercream recipe makes just enough to frost 24 cupcakes by spreading a layer of frosting on each rather than using a piping bag, so if you like to pipe on your icing, I suggest doubling the recipe.

After the butter has softened, cream butter in a mixing bowl until fluffy. I use a handheld mixer when I'm at school, and this takes me a good five minutes of mixing. So if you're using a handheld, don't give up on your butter; just switch hands.

When the butter is fluffy, add the powdered sugar a cup at a time, mixing on a low setting to keep from decorating your counter tops with lovely, but sticky sugar. When all 4 cups have been thoroughly incorporated, add the half and half a tablespoon at a time until the consistency is spreadable (or preferred consistency for the method of frosting you desire). Then, add the peppermint extract, mixing thoroughly to incorporate the flavor evenly throughout the frosting.

Frost cupcakes and sprinkle crushed candy canes on top of each cupcake.


I took these cupcakes to choir practice the next night as a treat after our last practice before Lessons and Carols, and when we arrived I realized that some of the candy cane color had bled onto the white icing. This did not affect the taste, only the appearance, but because of this color transfer, I suggest that you serve the cupcakes the same day that you make them.Overall, I think the few hours of writing that were sacrificed proved well worth it to my sanity and the taste buds of St. Paul's choir members.

If you try this recipe over the holidays, please drop back by and let me know how it went.

Happy baking and Merry Christmas!

Saturday, August 25, 2012

A Peach Pie

Peach pies are one of my favorite summer desserts. The combination of fresh, sweet peaches and a buttery crust could make anyone smile, but in my family that taste takes us back to long summer days by the water at the lake house in Chilton County, Alabama, the home of the best peaches in the South.


A few years ago, I came home from the farmers market delighted that I had found Chilton County peaches and ready to make a pie, but I quickly realized that I had only ever made crust in a food processor, a kitchen appliance that my tiny grad school kitchen does not include. I immediately called mom, and she reassured that this was not an impossible task and crust had been made long before the food processor was invented. With her ingredients list and over-the-phone guidance I learned how to make crust with two knives and a fork. It works surprisingly well and makes quite a crispy, buttery crust.


The Crust:
2 cups of AP flour
1/4 teaspoon of salt
8 tablespoons (1 stick) of cold butter
4 tablespoons (1/2 stick) of cold margarine
5 tablespoons of ice water


Combine the flour and salt in a large mixing bowl.

Cut the butter and margarine into single serving sized pats. It is important that the butter and margarine have just come out of the fridge because chilled butter holds its consistency when cut into the flour.


Take two knives and cut the butter and margarine into the flour, starting with the knives crossed and pulling towards the edge of the bowl. This action cuts the butter into smaller pieces and binds the flour to all sides of the butter.


After about 5 minutes of cutting when the butter looks like large pebbles in the flour, take the fork and mash the butter and flour through the tines to further incorporate the mixture. This will also cause butter to build on the fork. Use a knife to scrape off the build up and keep mashing. In between mashing, move the fork around the wall of the bowl, making sure that all of the flour is incorporated. The mashing step is complete when the mixture looks like coarsely ground corn meal (see photo below).


Now add the water a tablespoon at a time, first mixing with the fork and then kneading with your hands. The ice water helps the mixture come together without completely incorporating. 


You should be able to see swirls of butter in the kneaded crust. These swirls make the crust flakey and buttery without density, so don't over knead.

If you are using a round pie plate, separate the crust into two equal sections, wrap them separately in plastic wrap, and put them in the fridge for at least 1 hour. There is no need to separate the crust if you are making a larger cobbler that will only have a top crust. 


Side note: I use this pie crust for most of the pies that I make, and if I am making a pie that only requires the bottom crust, I put the other crust in the freezer and save it for the next pie or quiche.


The Peach Filling:
7 to 8 peaches peeled and sliced
1/2 cup of sugar
2 tablespoons of cornstarch
2 tablespoons of butter

Slice the peaches, and mix in the sugar and cornstarch.


Roll out the bottom crust.


I use this folding technique to move the pie crust to the pie plate without stretching or tearing the crust.


Place the crust in the pie plate, pour in the peaches, and slice the butter on top of the peaches.


Roll out the top crust and arrange it on the pie. The look of the top crust is completely up to you. I normally cut strips and make a lattice top, but a one piece top crust works just as well as long as you cut slits for the steam to escape.

Place the pie plate on a cookie sheet and bake at 350 degrees for 1 hour or until bubbly. Keep on eye on the crust, and if it is taking longer for the filing to bubble cover the edges of the crust with tin foil to keep them from burning.


Steve and I celebrated the first day of classes with peach pie. It was a nice way to end the summer. Hope y'all enjoy the recipe!

Tuesday, April 17, 2012

A Lulu Sugar Cookie or Two

"Lulu"  is my mother's "grandmother name." And, even though she was making these cookies long before she became a grandmother, I find it a fitting name for her most loved and requested cookie recipe. They are a thin butter cookie with a simple icing that can be cut out and decorated in any shape desired. Growing up, we made these cookies for every possible holiday, bake sale, classroom party, and sometimes just because. We would pick what cookie cutters to use from a huge cookie tin full of them--bunnies, ducks, flowers, shamrocks, hearts, pumpkins, witches, stockings, stars, Christmas trees. Then came the icing, and Mom would spread out wax paper on all the kitchen surfaces and let which ever children were around ice and sprinkle 'til their hearts were content. I have even started making these once a semester for my classes because everyone needs a little sugar and cheering up after taking an exam.


While home for Easter a couple weeks ago, Mom and I made her sugar cookies for a few special people. Here's our process:


Lulu’s Sugar Cookies
Yield: 75 cookies
2 sticks butter (softened)
1 cup sugar
1 egg
1 teaspoon vanilla
3 cups flour 
1 teaspoon baking powder 
1/8 teaspoon salt
Combine butter and sugar in a mixing bowl. Beat with an electric mixer until foamy (at least 5 minutes). Add egg and vanilla. Beat well. Sift flour, baking powder, and salt together. Add to the mixture and beat well. 


After the dough is combined well, separate equally and form into two sections. Cover in plastic wrap and refrigerate overnight (I've gotten away with putting them in the freezer for 30 minutes or the refrigerator for 2 hours in a pinch, but it works best if you make the dough the night before). 


Take one section of dough out at a time and let it soften for 5 to 10 minutes. Pre-heat the oven to 350. Roll out the dough to roughly 1/8-1/4 inch thick. Cut out desired shapes.


Bake on a lined cookie sheet for about 10 minutes or until just the tiniest bit of light brown come up around the edges. 


Now for the icing: We we use a simple icing made of powdered sugar, water, and food coloring. It takes a lot less water than you think, so I recommend adding it by the tablespoon and stirring it into the powdered sugar completely before adding more. You want it spreadable, but not to thin that it runs off the cookie or too thick that it is hard for the kids to spread easily.  Make sure to use the sprinkles before the icing has completely dried. If you get the icing on the cookies while they are still warm the icing will dry shiny.


Try not to stack them on top of each other until the icing has completely hardened or it will smudge. I hope you enjoy the baking, decorating process, and, of course, the buttery, sugary cookie goodness.